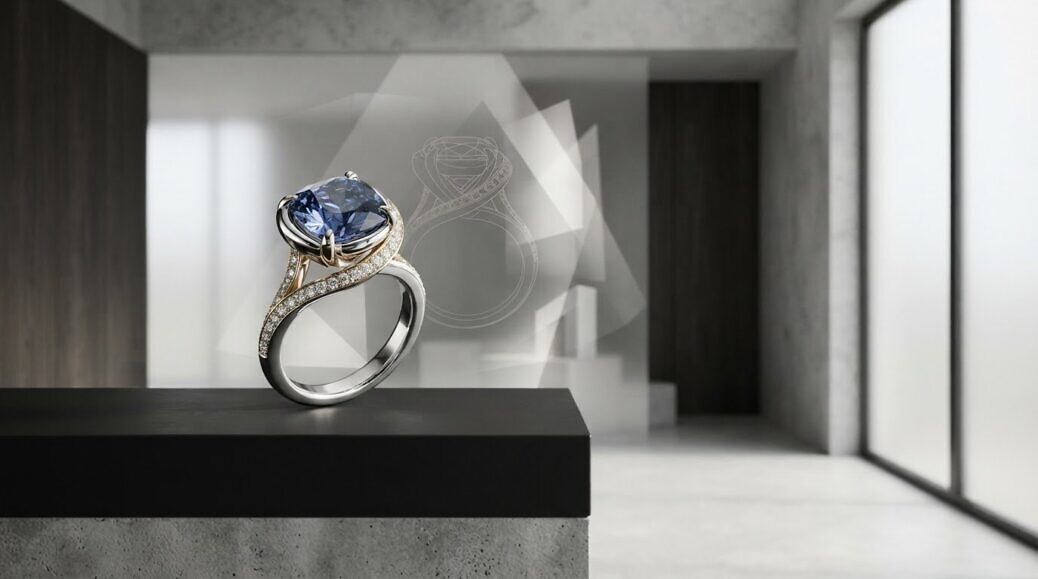
The most convincing jewellery render is not necessarily the one made with the most sophisticated software. With 3d rendering for jewellery, the key question is whether the image represents the design faithfully, from metal reflections and gemstone appearance to settings and surface detail. A compelling image that distorts the piece can undermine trust before a customer sees it in person.
If you are weighing a self-serve platform against commissioned CGI, the choice depends on what you need the imagery to do. Each route offers a different balance of control, repeatability and visual direction. Your design information, intended audience and brand goals should guide the decision. This guide explains how to compare the options and assess image quality, without treating software features as a substitute for sound visual judgement.
You will learn what to examine in materials, lighting and detail; how to check a render against the design; and which technical specifications to define before a commission. Line Creative’s CGI and product visualisation work focuses on visual storytelling, helping you plan imagery that communicates product and brand intent consistently.
Key Takeaways
- 3d rendering for jewellery turns a digital design into an image or animation, helping communicate form, finish and product story before photography.
- Assess silhouette, proportions, surface finish, reflections and fine details to judge whether a render represents the design clearly.
- Choose between self-serve tools and commissioned CGI by weighing workflow repeatability against the need for bespoke visual direction.
- A focused brief starts with audience and intended use, then brings together design information, visual references and brand guidance.
- Agree the required deliverables and technical specifications early so the final imagery supports your brand’s visual goals.
What 3D Rendering for Jewellery Can Achieve Beyond a CAD Model
A CAD model defines a piece in three dimensions, but it does not determine how the piece will be presented. 3d rendering for jewellery turns a digital design into a two-dimensional image or animation by combining the model with materials, lighting and a virtual camera. The finished visual can communicate form, proportions, finish and product story before physical photography is available. For a general explanation of the process, see What is 3D Rendering?
Keep the asset types distinct. A CAD model describes geometry and supports design work. A rendered image presents a selected view and visual direction. An interactive asset lets a viewer explore a model, while product photography records an actual object through a camera. A render can communicate an intended appearance, but it should not be treated as photographic evidence of a finished piece.
How jewellery CGI turns a digital design into an image
The model supplies the geometry: the form and relationships between components represented in three dimensions. Materials and lighting determine how surfaces appear, while camera position, framing and visual direction guide attention and establish mood. A close view might prioritise a setting or profile; a wider composition can place the piece in a brand-led scene. These choices shape the image, but they cannot compensate for missing or inaccurate design information. The result depends on the supplied model and references, as well as the objectives agreed for the visual.
Start by identifying which design details must remain faithful and what the image needs to communicate. A concept presentation, for example, may need a view that explains the silhouette. A campaign image may place greater emphasis on atmosphere and brand character. Defining that distinction helps guide decisions about camera angle, lighting and composition.
When a jewellery render is useful
Rendering can support communication and review at different stages. Match each visual to a clear purpose:
- Concept presentation: communicate a proposed design before a physical piece is ready to photograph.
- Product pages: prepare a considered product visual for digital presentation, with the intended view and finish clearly defined.
- Campaigns: develop imagery around a chosen product story and visual direction.
- Internal review: discuss proportions, presentation and design intent with stakeholders using a shared visual reference.
For consistent communication across digital marketing channels, plan the visual direction around the audience and the purpose of each asset. Product visualisation and CGI animation can make an image or sequence a deliberate expression of the product and brand, rather than simply an attractive output from a model.
How to Judge 3D Jewellery Rendering Quality: Materials, Light and Detail
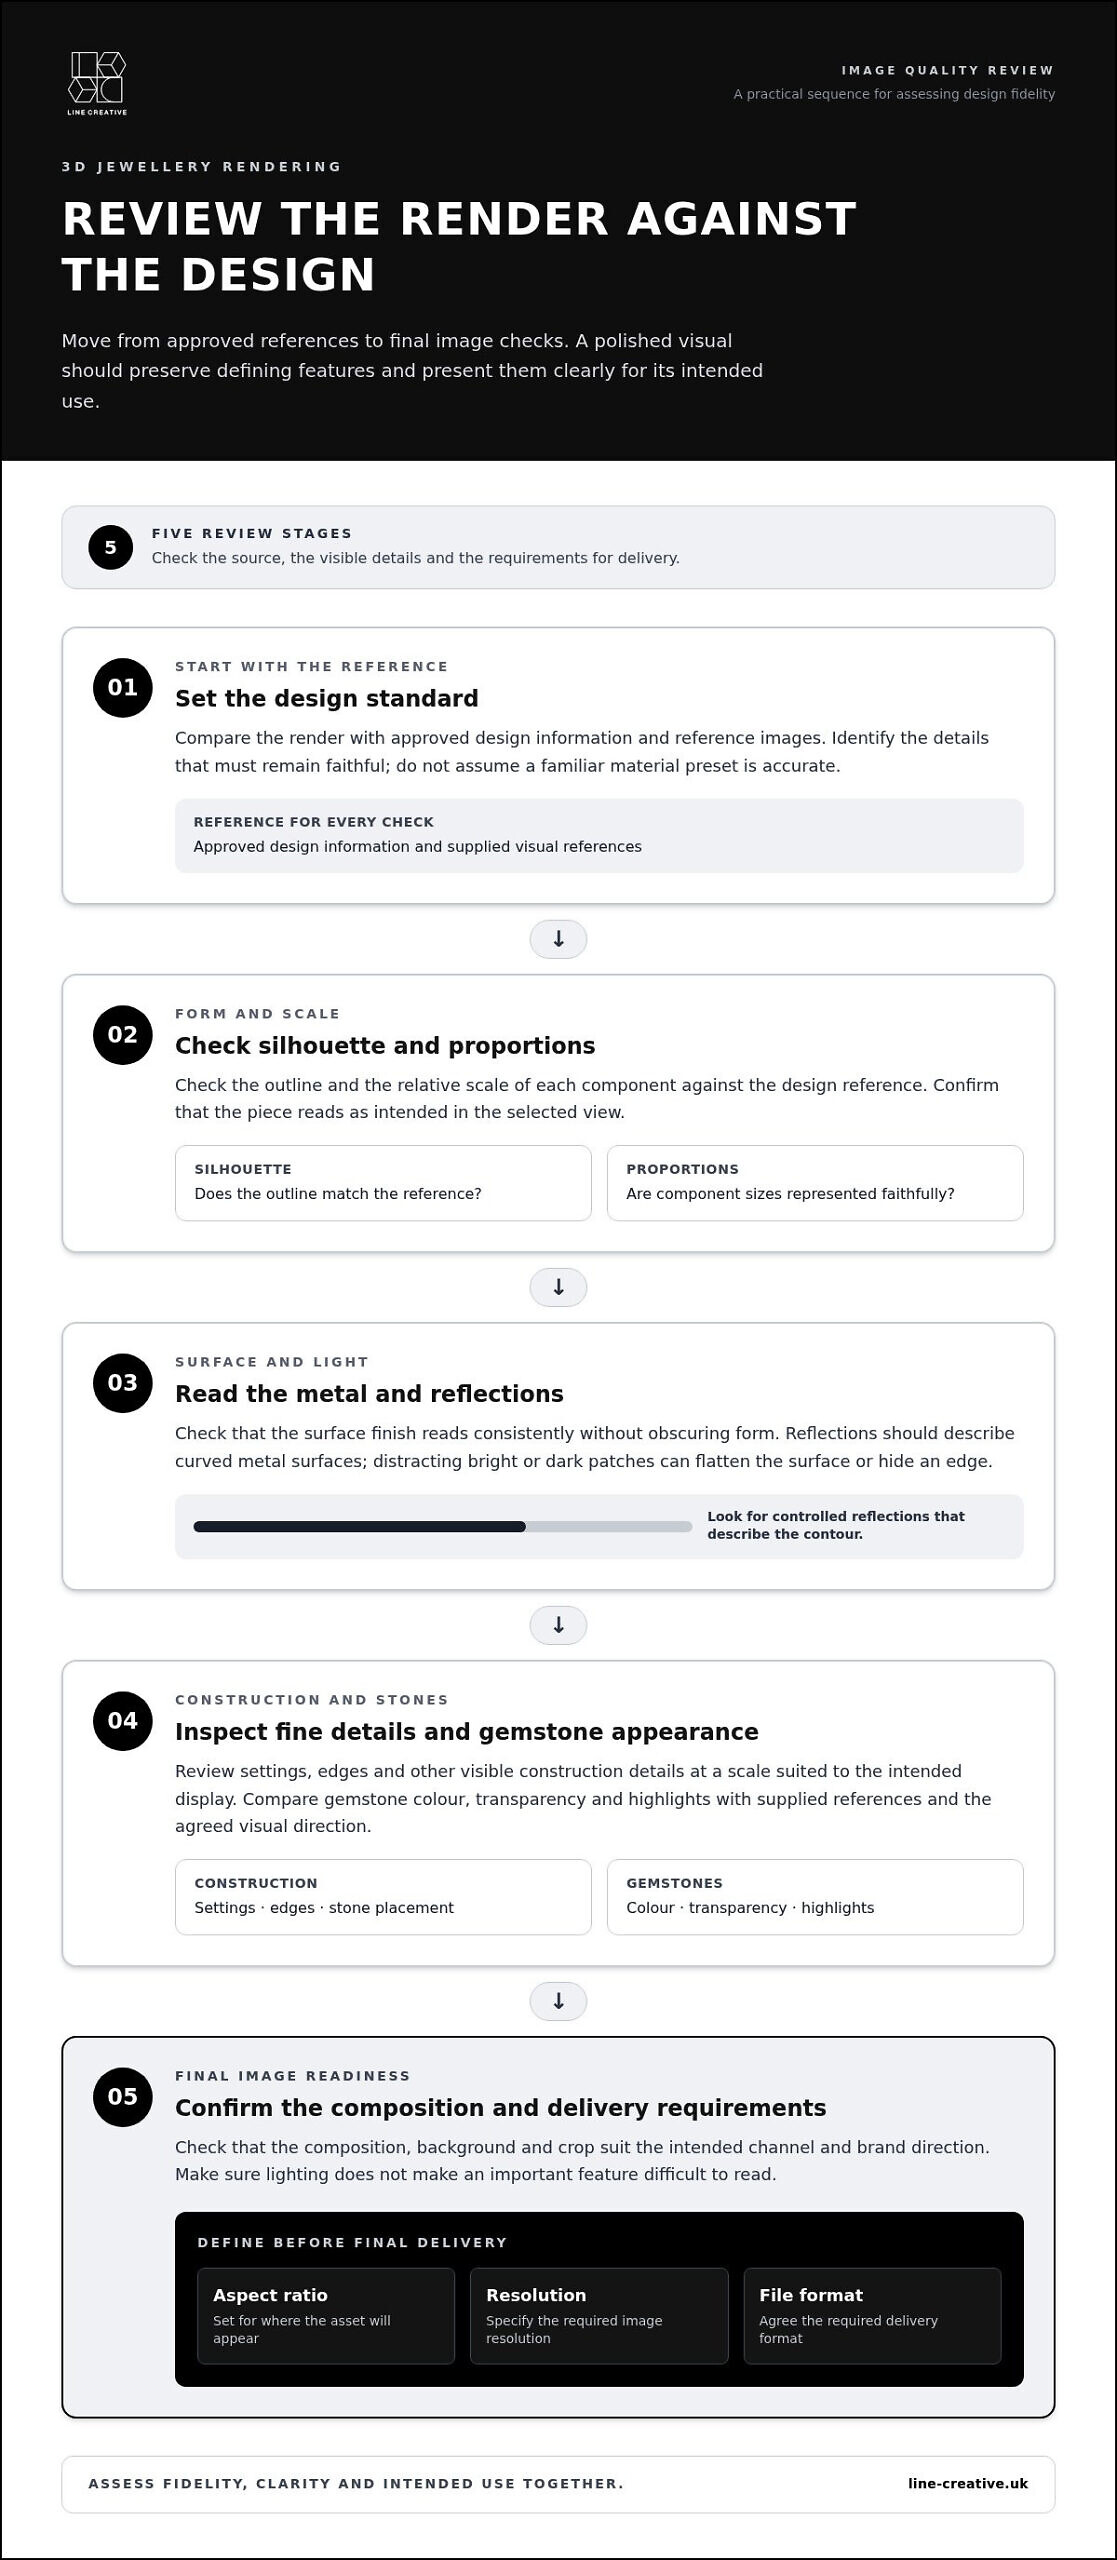
A convincing render should do more than look polished. It should preserve the design’s defining features and present them clearly for their intended use. Assess 3d rendering for jewellery against approved design information, not a generic idea of how metal or gemstones should appear. Use this checklist to review the image systematically:
- Silhouette and proportions: Check the outline and relative scale of each component against the design reference.
- Surface finish: Check that the finish reads consistently across visible areas without obscuring their form.
- Reflections and highlights: Look for reflections that describe curved metal surfaces rather than merging into distracting bright or dark patches.
- Fine details: Inspect settings, edges and other visible construction details at a scale suited to the image’s intended display.
- Gemstone appearance: Compare colour, transparency and highlights with the supplied references and agreed visual direction.
Assessing metal, gemstones and reflections
Lighting affects how clearly a curved metal surface reads. A broad, controlled reflection can describe its contour; a poorly placed highlight may flatten the surface or obscure an edge. Gemstones also need deliberate treatment: colour and light response shape their appearance, so generic effects can distract from the design intent. Compare the render with approved reference images and flag discrepancies rather than assuming a familiar material preset is accurate.
Context matters too. A product image for a clean product page may need a different background and lighting emphasis from an image created for a brand campaign. In either case, align the setting and composition with the asset’s purpose.
Checking design fidelity and image readiness
Before sign-off, compare the image with the approved design information. Confirm that proportions, setting, stone placement and visible construction match the reference. Then check whether the composition, background and crop suit the intended channel and brand direction. A striking image may still be unsuitable if the crop removes a key feature or the lighting makes an important detail difficult to read.
Define technical specifications in the brief, including aspect ratio, resolution and file format. These requirements depend on where the asset will appear, so establish them before final delivery rather than relying on later adjustments. For a project requiring considered CGI and product imagery, Line Creative’s 3D rendering and CGI connects visual direction with product communication.
Self-Serve Jewellery Rendering or Commissioned CGI: Which Route Fits?
The right route for 3d rendering for jewellery depends on what your team needs the images to do. A self-serve platform can support a repeatable production process; commissioned CGI can shape a more bespoke visual narrative. Neither approach is right for every brief. Compare the workflow with your objectives, available assets and internal capacity.
| Criterion | Self-serve platform | Commissioned CGI |
|---|---|---|
| Control | Work within the platform’s available settings and controls. | Agree visual direction around the brief and intended audience. |
| Repeatability | Can suit teams producing a recurring set of product views. | Can establish a tailored approach for a specific campaign or asset. |
| Visual direction | Often organised around selectable scenes, presets or templates. | Can centre on bespoke storytelling and brand intent. |
| Asset handling | Some platforms include asset libraries, batch rendering or ecommerce integrations; features vary by platform. | Assets and deliverables are organised around the commission’s requirements. |
| Project complexity | May fit established workflows using existing digital assets. | May suit a brief requiring a distinct visual concept or coordinated creative direction. |
When a jewellery rendering platform may suit the workflow
A platform-led approach may fit a team that already has digital assets and needs to manage recurring visual production through an established process. Asset libraries can help organise files; batch rendering can support repeatable output; ecommerce integrations may connect imagery with a product workflow. These are examples, not standard features across every platform. Available controls, formats and image results depend on the specific tool and workflow. For businesses aligning their 3D pipelines with online retail operations, resources covering jewelry ecommerce strategy consulting offer practical guidance on platform selection and digital merchandising.
When bespoke CGI may better serve the visual brief
A commission can put the product story, audience and campaign purpose at the centre of the visual direction. This can be useful when the brief calls for imagery shaped around a particular brand mood rather than a repeatable preset. Line Creative’s CGI and product visualisation work focuses on visual storytelling; explore its 3D rendering CGI services to see how that scope is framed.
Decision rule: Choose a platform-led workflow when you need repeatable output from existing assets. Choose commissioned CGI when the brief depends on specific visual storytelling. If both needs matter, define which deliverables must remain consistent and where bespoke direction adds value, then select the route that best fits your team’s process.
How to Commission 3D Rendering for Jewellery with a Clear Brief
A clear brief turns 3d rendering for jewellery from a general visual request into a set of practical creative decisions. It aligns the intended audience, design information and brand direction before production begins. Use these steps to give the CGI team a focused basis for the commission.
- Define the audience and use. State who needs to see the imagery and where it will appear, such as a product page, campaign, concept presentation or internal review. Explain the product story and the role each visual should play. A product-page image may prioritise a clear view of the design, while campaign imagery may need to express a particular brand mood.
- Assemble design information. Provide approved design files and available references that help explain the piece. Reference images can clarify the intended appearance of materials, lighting or composition; brand guidance can establish the visual language. Identify which details are fixed and where interpretation is welcome. If a detail is unresolved, flag it rather than leaving it open to assumption.
- Set visual direction. Describe priorities for framing, background, material appearance and emphasis. You might specify that the setting must remain clearly visible or that the composition should focus on the piece’s profile. If animation is required, explain what the movement needs to communicate. Specific direction gives the creative process a purpose without prescribing every production choice.
- Agree deliverables. Define whether you need still images, animation or both, and list the intended uses, formats and technical specifications. Set requirements such as aspect ratio and resolution according to the channels where each asset will appear. Clear deliverables help keep production aligned with the brief and reduce avoidable changes at handover.
Aligning review and project expectations
Agree how feedback will be gathered and who will consolidate it. Review comments against the approved design information and agreed visual direction, separating essential corrections from preferences. For example, a note about stone placement concerns design fidelity; a request for a different background concerns creative direction. Distinguishing the two keeps decisions focused and revisions aligned with the image’s purpose.
Proposals are tailored to each commission, taking into account project complexity, available design information, deliverables and programme. A concise brief gives those factors context and helps define a scope suited to what the work needs to communicate. Once your audience, references and outputs are assembled, use the project contact page to discuss your CGI project and its visual requirements.
Set a Clear Direction for Your Next CGI Project
Decide how the imagery should serve your brand as its products and campaigns evolve. Treat each approved visual as a reference point for future creative choices, helping your team maintain a considered direction as new content is developed. With 3d rendering for jewellery, clarity of purpose matters as much as the image itself.
Set a clear internal view of what the audience should take away, then use that intent to guide creative decisions. This gives the project a stronger foundation and keeps visual choices connected to your brand priorities.
Ready to define your next brief? Discuss your CGI project with Line Creative and set a clear direction for the work.
Frequently Asked Questions
What is 3D rendering for jewellery?
3D rendering for jewellery is the image-generation stage that turns a prepared digital scene into a viewable output. When planning a project handover, distinguish the editable scene from the exported image: a scene may contain camera, lighting and material settings, while an image is a fixed visual deliverable. Agree whether you need final images only or editable source files, as these are different outputs to plan for.
How realistic can a 3D jewellery render look?
A render can have a photorealistic appearance, but assess its credibility at the size and resolution where people will see it. Review the full image first, then enlarge critical areas to spot jagged edges, unexpected artefacts or unclear details. A file that reads well on a large monitor may look different when reduced for a smaller digital placement, so evaluate it in its intended display context.
Can 3D rendering show different metals and gemstones?
Yes. If you need to compare material options, ask for each variation to use a consistent camera angle and lighting setup. This makes differences easier to assess because the composition stays stable while the material treatment changes. Label each version clearly, especially when several options are under review, so feedback refers to the intended design and finish rather than an ambiguous image.
Is jewellery CGI better than traditional product photography?
Neither is right for every communication need. Photography records a physical piece as it exists, making it suitable when viewers need to see the manufactured item. CGI can represent a design before a physical item is available. If a campaign includes both existing stock and planned designs, use each format for the relevant product status so a proposed design is not mistaken for a photographed product.
What files do you need for a jewellery rendering project?
There is no universal file set: requirements depend on the available design information and intended output. Start with an inventory of source materials, noting each file’s version and which design it represents. If several variants exist, map each one to its relevant reference. This gives the production team a clearer file trail and helps prevent an outdated drawing or model from being treated as the approved design.
Can one jewellery 3D model be used for different images or campaigns?
A model can often serve as the shared geometric source for a set of images, but that does not make every campaign asset ready automatically. Each output may need its own camera composition, scene and visual treatment. Plan which views and campaign uses can draw on the same model, and record when a design change requires a new version. This supports consistent asset planning without confusing creative changes with product changes.